Customising your iPhone ringtone adds a personal touch to your device and helps you stand out from the crowd.
While there are various ways to create custom ringtones, using GarageBand or iTunes on your iPhone is both convenient and free. Plus, it only takes a few minutes to do.
In this guide, you’ll find step-by-step instructions to make your own iPhone ringtone from a song or any other audio file. However, note that you can’t use songs from Apple Music or other streaming services because they’re protected.
The first method is for creating a ringtone directly on your iPhone. If you’d prefer to get music from your Mac/PC, then scroll down to our second method, which uses iTunes.
Make an iPhone ringtone using GarageBand
1.
Install and open GarageBand

Jim Martin / Foundry
Open the GarageBand app on your iPhone. If you haven’t installed it yet, you can download it from the App Store.
2.
Create a new project
Jim Martin / Foundry
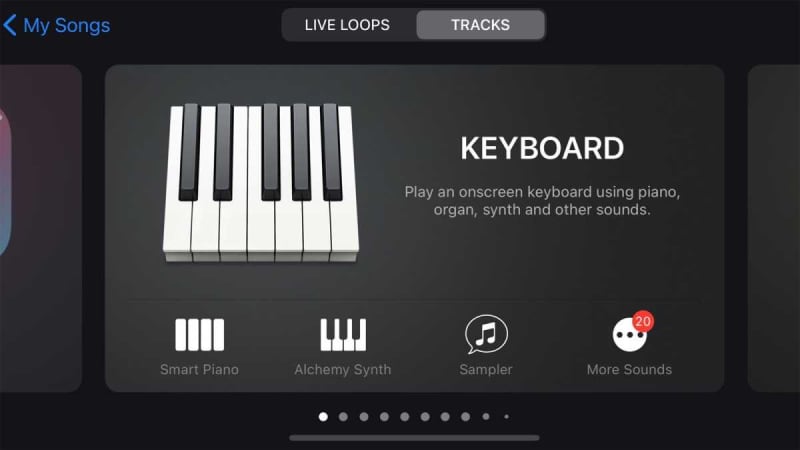
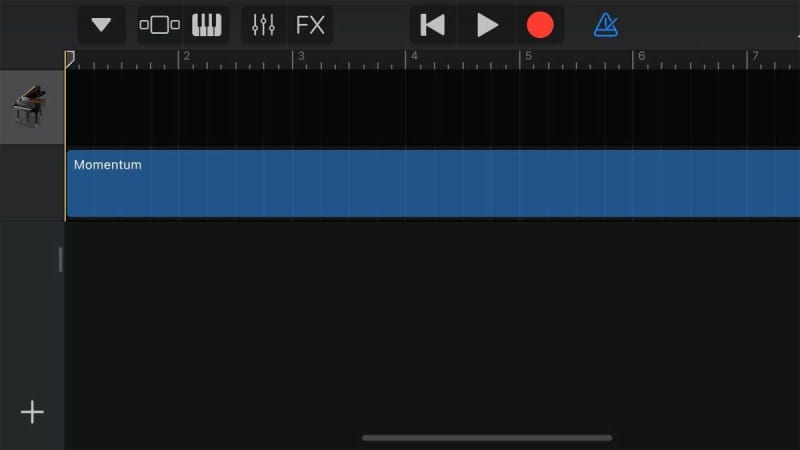
Tap on “+” icon in the top right corner to start a new project. Then swipe and choose an instrument.
It doesn’t matter which one. The keyboard is the first one in the list, so we’ll use that. Tap on it to open it.
3.
Open the editor
Jim Martin / Foundry
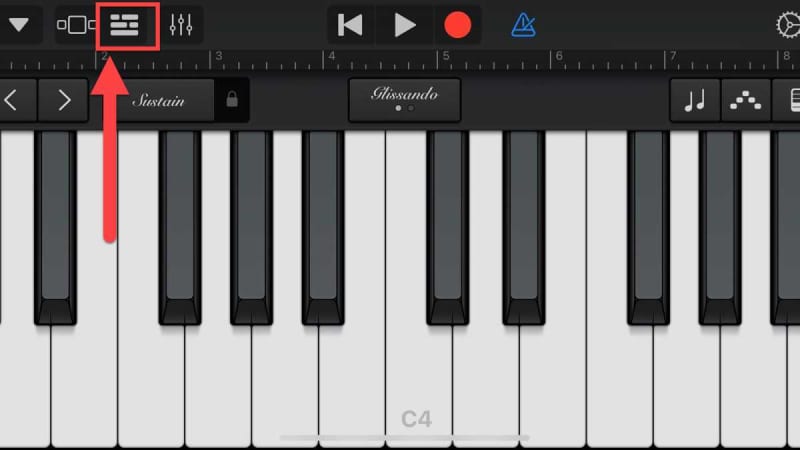
Tap on the “editor” icon, it’s the third one in the top left corner.
4.
Tap the loop icon

Jim Martin / Foundry
Tap the loop icon in the top right corner.
5.
Go the Music tab
Jim Martin / Foundry
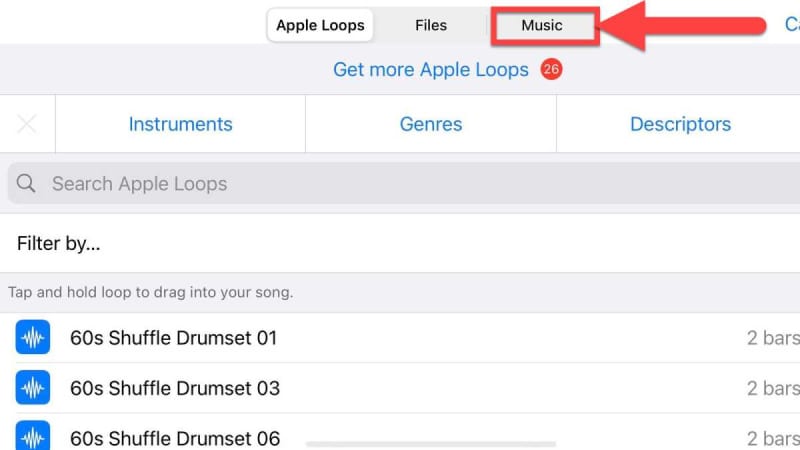
GarageBand is set up for importing loops, but you can also do it with songs. Tap on “Music” at the top right to see the songs already on your iPhone.
However, it’s important to know that you can’t use songs from Apple Musicor other streaming services because they’re protected. Instead, you’ll need an audio file that has no DRM – digital rights management. One of the simplest ways to get some audio is to download it from a YouTube video.
You can also tap “Files” and navigate to the song you want to use as your ringtone that’s on your iCloud or internal storage.
6.
Browse songs
Jim Martin / Foundry
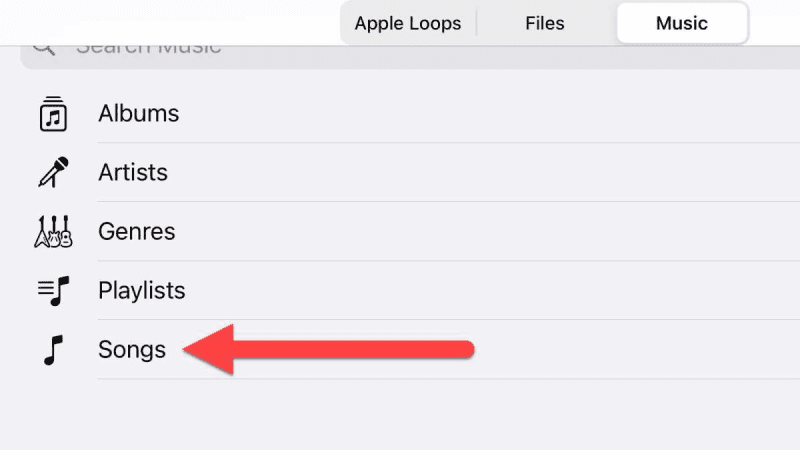
If you chose “Music”, tap on “Songs”.
7.
Find your song

Jim Martin / Foundry
Scroll through the list, or tap on the letter it begins with from all the music on your iPhone.
If you have downloaded podcasts, these will be shown in this list as well, despite not being ‘songs’.
8.
Drag the song into GarageBand
Jim Martin / Foundry
To get the song from “Music” tab or a file from “Files” tab into the GarageBand editor, you must tap and hold on it. Drop it into the second track down – not the first keyboard track.
9.
Edit the song
Jim Martin / Foundry
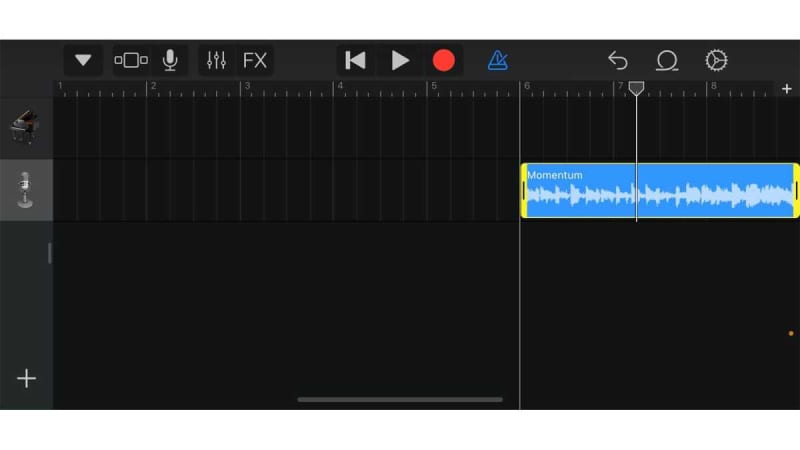
Once the song is imported, it will appear as a yellow waveform on the timeline. Trim the song to your desired length by dragging the ends of the waveform.
Remember, iPhone ringtones have a maximum duration of 30 seconds.
10.
Save your ringtone
Jim Martin / Foundry
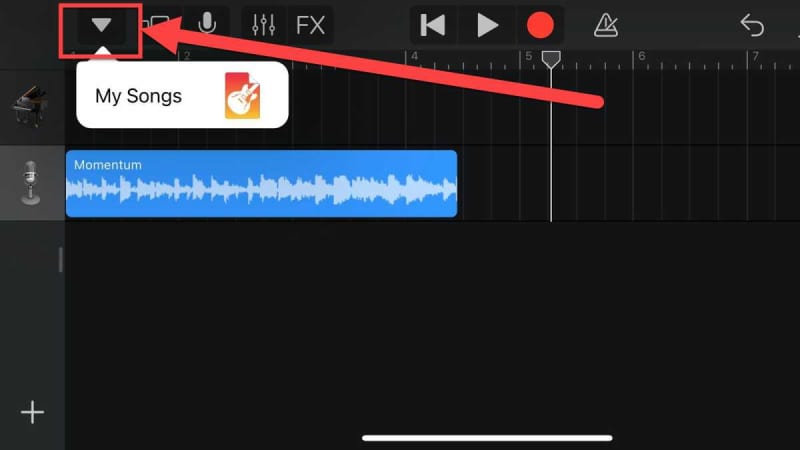
Once you’re satisfied with your ringtone, tap the arrow icon in the top left corner. Then tap “My Songs” to save your ringtone. Give it a name and tap “Save.”
11.
Export the song
Jim Martin / Foundry
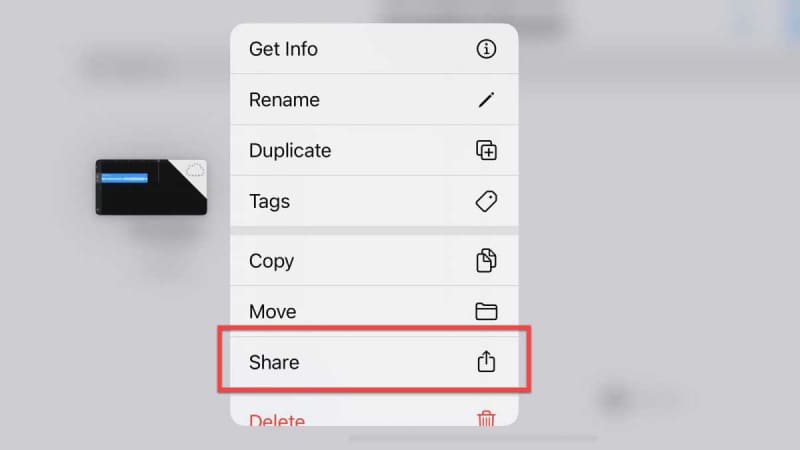
Tap and hold on your saved ringtone until a menu appears. Select “Share”.
12.
Save your ringtone
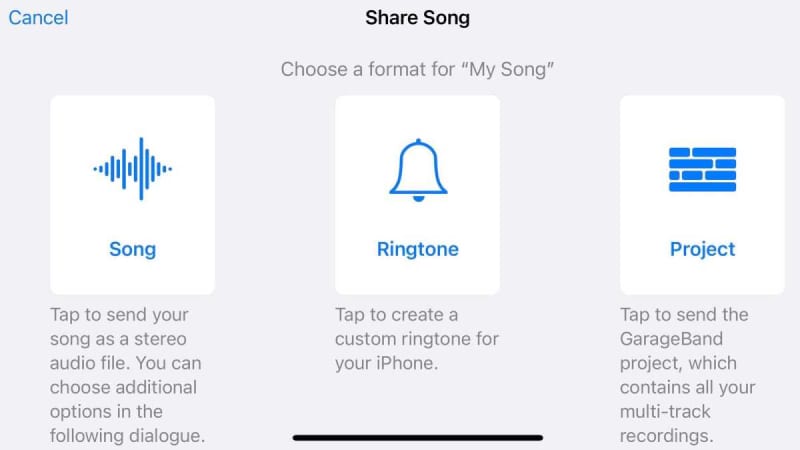
Jim Martin / Foundry
Simply tap the “Ringtone” option. Your ringtone will be exported to the iPhone’s settings.
13.
Name your ringtone
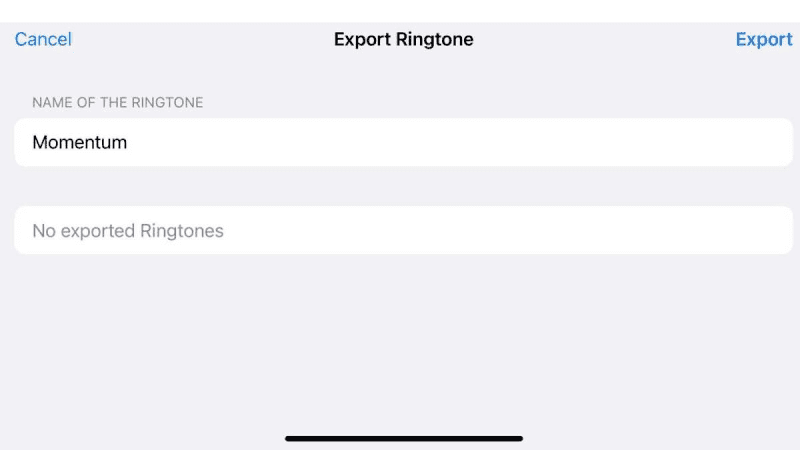
Jim Martin / Foundry
Type in a name for your ringtone so you can identify it.
14.
Set your song as a ringtone
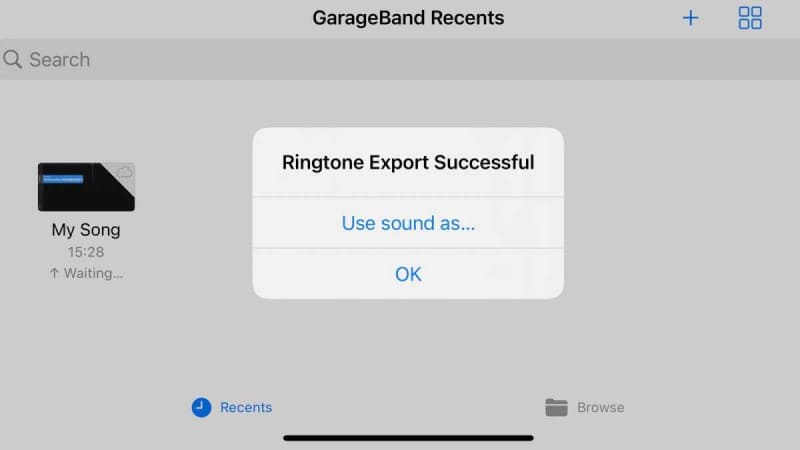
Jim Martin / Foundry
After it has exported, tap “Use sound as…”.
15.
Choose the type of tone
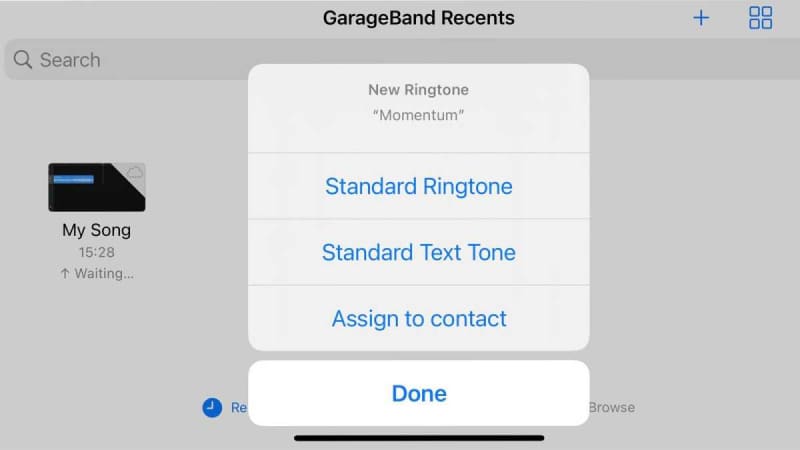
Jim Martin / Foundry
You’ll probably want to pick “Standard Ringtone” from the options, but you can use it as a “Standard Text Tone” or even assign it to a particular contact so you know who is calling.
As said earlier, you can also see your ringtone in the “Settings” app under “Sounds & haptics” and set it as a tone for other apps if you want to, or pick it later if you change ringtones in the meantime.
Make an iPhone ringtone using iTunes
This second method might not be as convenient as using GarageBand on your iPhone, but it allows you to be much more precise about the section of audio to be used as a ringtone.
This method uses iTunes, which is available for both Windows and Mac. You can download the app directly from Apple.
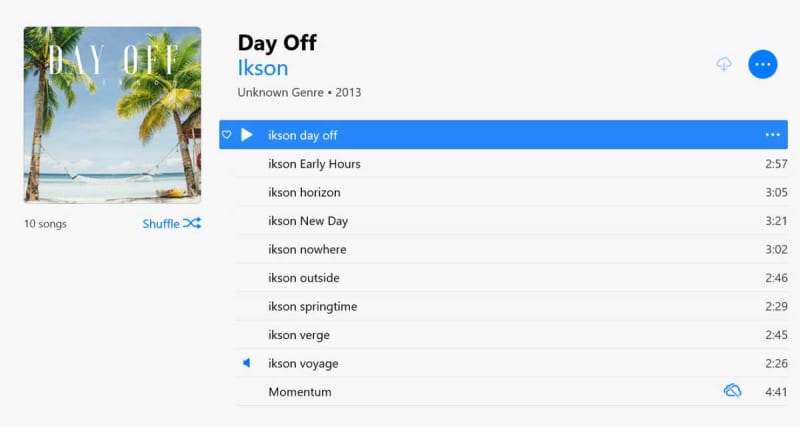
1. Prepare your song
Jim Martin / Foundry
To create a custom ringtone, begin by selecting the desired song or audio file and importing it into your iTunes library on your computer. Ensure it’s not from Apple Music due to copyright protection. You can also use real-world sounds or recordings from the Voice Memos app.
Make sure you have the latest iTunes version, then launch it. Navigate to “File” > “Add File to Library” or “Add Folder to Library” to import the file. In your “Library”, select the album containing the desired file, right-click on the song, and choose “Song Info” to proceed.
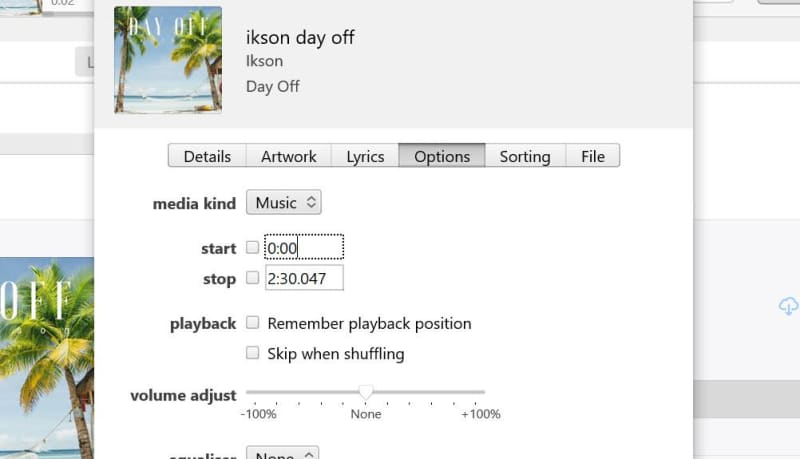
2. Choose timings
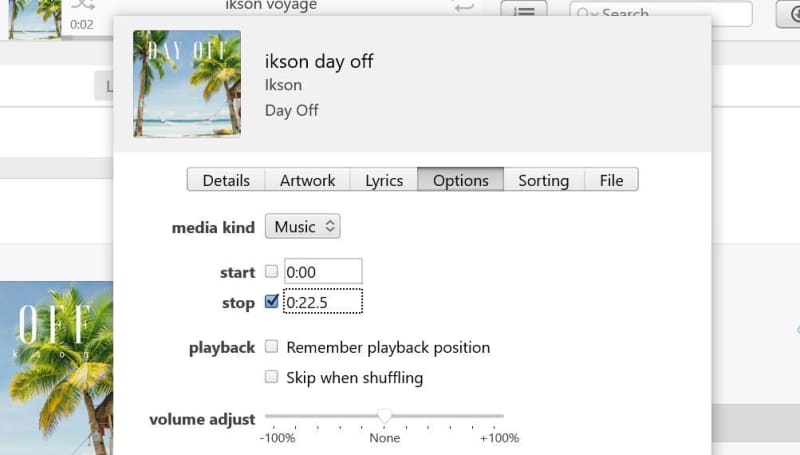
To customise the ringtone duration, open the “Options” tab in the “Song Info” window. Check the “Start” and “Stop” boxes and input the desired start and end times for the ringtone.
Ensure the stop time is within 30 seconds, the maximum length for a ringtone. For precision, use decimal points for specific timings, like 0:44.5 for 44 and a half seconds.
You can even specify times in thousandths of a second, such as 0:44.652. Once set, click “OK” to close the window.
3. Create AAC version
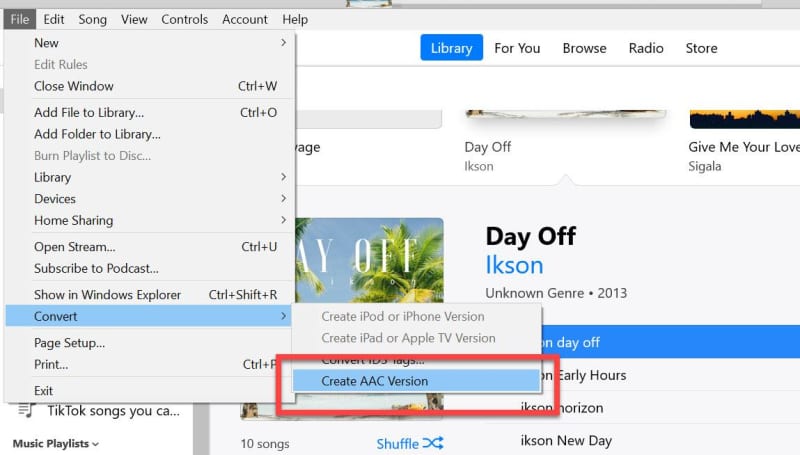
After setting the desired start and stop times, select the song again and navigate to the “File” menu. Choose “Convert”, then select “Create AAC version”. This action will generate a new track in your iTunes library, consisting of only the section between the specified start and stop times.
If the original song is tagged with album and artist information, the new shortened track will appear as a duplicate within the same album, identifiable by its duration displayed on the right-hand side. However, if the album, artist, and song info are not present, it will appear as a new album in your library containing a single song.
3a. AAC Encoder
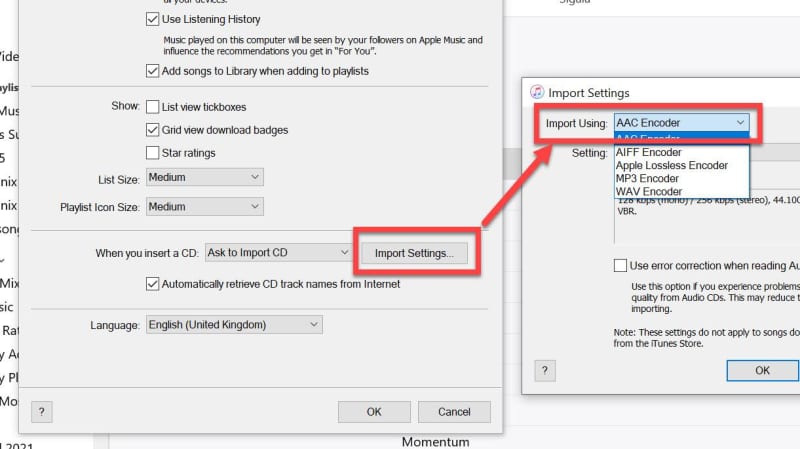
If the option to “Create AAC version” was not available in step 3, it’s likely due to incorrect CD rip settings. To rectify this, navigate to the “Edit” menu and select “Preferences”.
Next, click on “Import Settings” located next to ‘When you insert a CD,’ and choose “”AAC Encode”r from the drop-down menu beside ‘Import using:’.
4. Reset start & stop times
To maintain organisation, revert to the original settings of the song. Access the original album, right-click, choose “Song Info”, and navigate to the “Options” tab.
Untick the “start” and “stop” times, restoring them to their original values, then click “OK”. This prevents the track from playing only within the customised section in future plays, ensuring it plays in its entirety.
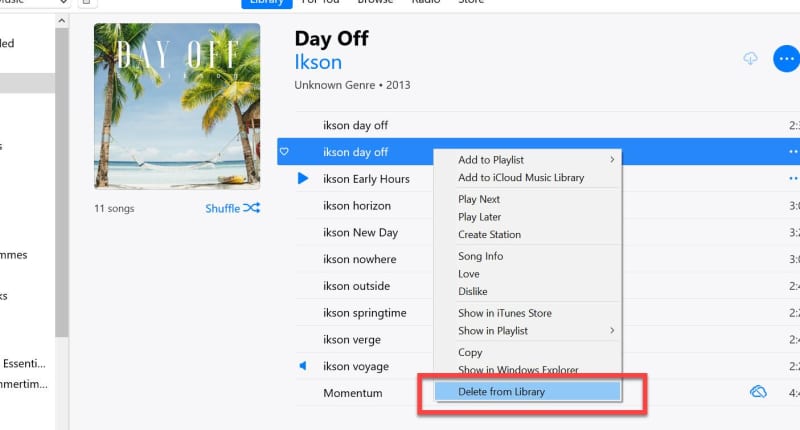
5. Find the new AAC file
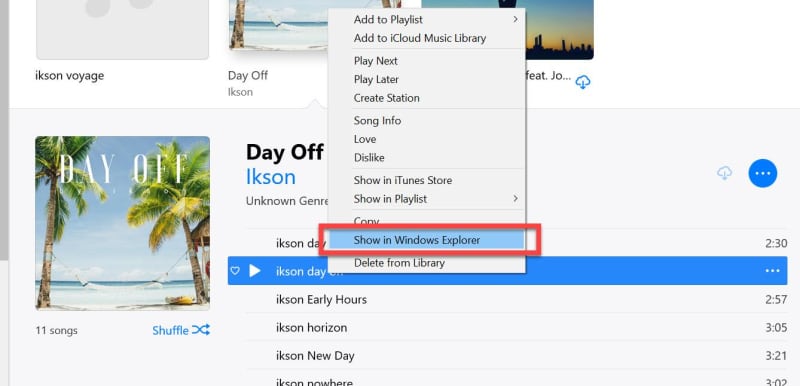
Locate the duplicate track or album containing the newly created ringtone. Right-click on the song within the album and select “Show in Windows Explorer” (or “Show in Finder” for Mac users).
This action enables you to access the file’s location for the subsequent step of changing its file extension to create the ringtone.
6. Change the file extension
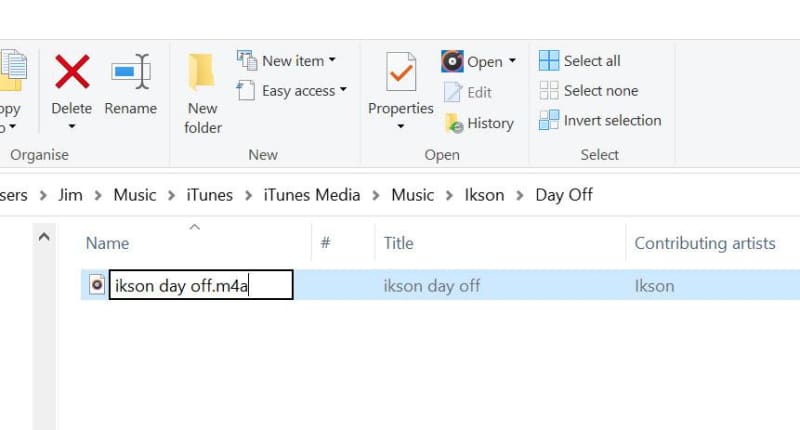
After locating the file, it should be highlighted in the window and named “something.m4a”, with ‘something’ representing the song’s name.
If the .m4a extension is not visible (e.g., you only see ‘ikson day off’ instead of ‘ikson day off.m4a’), it’s because Windows is set to hide extensions. Follow these steps to reveal the extension:
- Right-click on the file and choose Rename.
- Change the extension from .m4a to .m4r and press “Return”, “Enter”, or click in a blank area.
On a Mac, the process is similar. After renaming, you’ll likely receive a warning asking if you’re sure about the change. Click “Yes” on Windows or “Use .m4r” on a Mac.
It’s crucial to note that simply adding .m4r won’t work if extensions are hidden in Windows. You’ll end up with ‘ikson day off.m4r.m4a’, which won’t function correctly.
7. Import & sync ringtone
With the removal of the “Tones” section in iTunes version 12.7, the process of syncing custom ringtones to your iPhone is slightly modified. Here’s how to do it:
- Connect your iPhone to your computer using its Lightning cable. If you’re on Windows 10, tap “Trust this computer” on your iPhone screen. If this message doesn’t appear, try unplugging and replugging the USB cable, unless you’ve already completed this step before.
- Enter your phone’s passcode to confirm trust in the computer and wait until your phone icon appears in iTunes, which may take a couple of minutes. You might also encounter a message in iTunes asking for permission to access information on your iPhone. Click “Continue” to grant access.
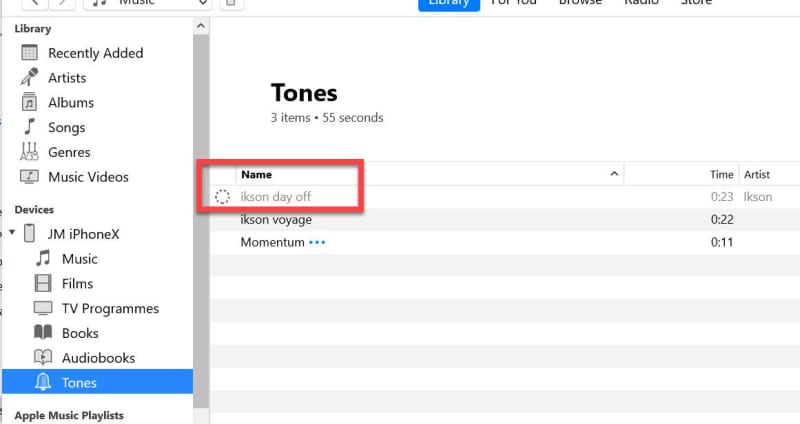
- In iTunes, locate your iPhone in the left-hand column under “Devices”. Click on it to expand the list, and then find the “Tones” section.
- If you have custom tones, they will appear on the right. If not, the list will be blank.
- Switch to your “File Explorer” (Windows) or “Finder” (Mac), where your ringtone file should be highlighted. If not selected, click on it.
- Press “Ctrl+C” (Windows) or “Command+C” (Mac) to copy the file.
- Return to iTunes, ensure the “Tones” section is selected, and press “Ctrl+V” (Windows) or “Command+V” (Mac) to paste the tone.
- The tone should now appear in the list and automatically sync to your iPhone within a few seconds.
For Mac users experiencing issues with tones not appearing in the “Tones” section:
- Delete the ringtone ‘song’ entry in your iTunes music library (without deleting the actual file on your hard drive) and double-click on the .m4r file in “Finder” to add it to “Tones”.
- If the above step doesn’t work, move the .m4r file outside of your iTunes folder on your hard drive (such as to the desktop) and double-click on it to add it to “Tones”.
8. Remove ringtone from library
While it’s not mandatory, it’s advisable to delete the new AAC version of the song you just created from your iTunes music library.
Managing multiple ringtones can become messy, and having single-track albums that won’t play (due to the changed extension) can be confusing. Deleting these AAC versions helps maintain clarity and organisation in your iTunes library.
9. Change your ringtone to the new one you just created
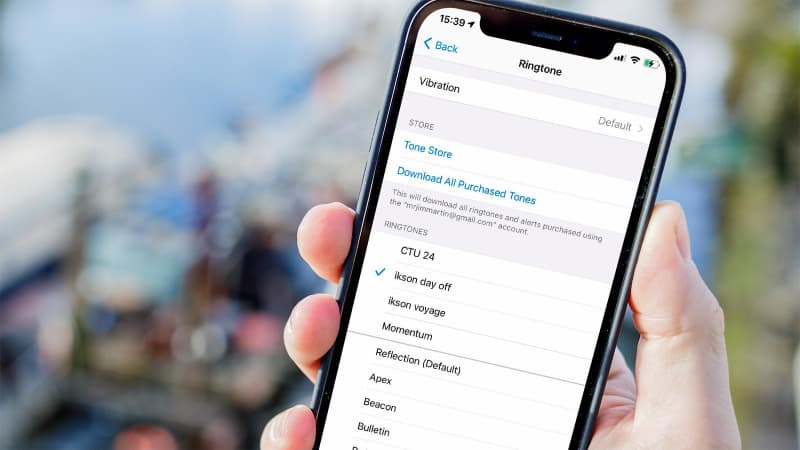
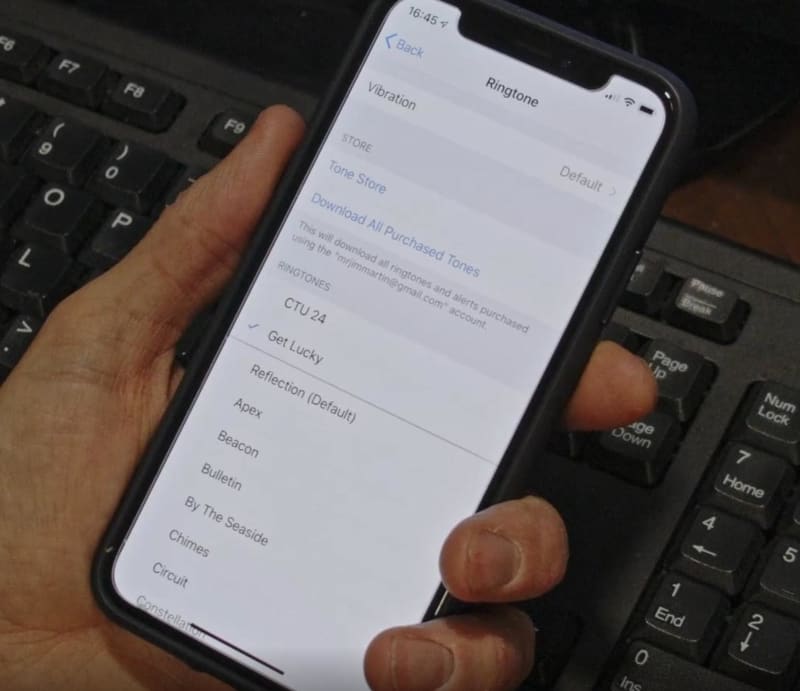
To set your newly created tone as your ringtone on your iPhone, open the “Settings” app, navigate to “Sounds & Haptics”, then select “Ringtone”. From the list, choose your custom tone.
Additionally, you can use your custom tones for text message alerts or any other notification sounds.
10. Use your ringtone as a notification sound
Additionally, to set a custom tone for various notifications, choose the appropriate section in “Sounds & Haptics” for the notification type you want to customise, like “Text Tone”. Scroll down to see your “Ringtones” list, where your custom tones will appear at the top. Select the custom tone you want to use.
And that’s it, you’ve successfully created your own iPhone ringtone from a song for free. Whether you did it with GarageBand or iTunes, from now on you can enjoy your personalised ringtone and let everyone know to which rhythms you like to rock the most.