So, you’ve got a new Android phone and want to get your voicemail up and running. Or maybe you’ve had one for a while and never gotten around to recording the message people hear when they call you.
Well, both of those are easily fixed, as setting up voicemail on an Android phone is simple. Here’s how to get everything just the way you like it.
How do I know if I have voicemail set up on my phone already?
Voicemail is something that’s handled by your mobile network/carrier, rather than the phone maker itself.
It’s usually the case that as soon as you put the SIM in your handset (or set up eSIM), the service is set up by default. However, that’s not always the case – some may require you to record a message or at least record your name so that it appears in the message.
To check if you have voicemail set up, there are a couple of methods. The most obvious is to get a friend or family member to call you but you don’t answer the call. After a short number of rings, your phone should register a missed call and the caller will go through to your voicemail service.
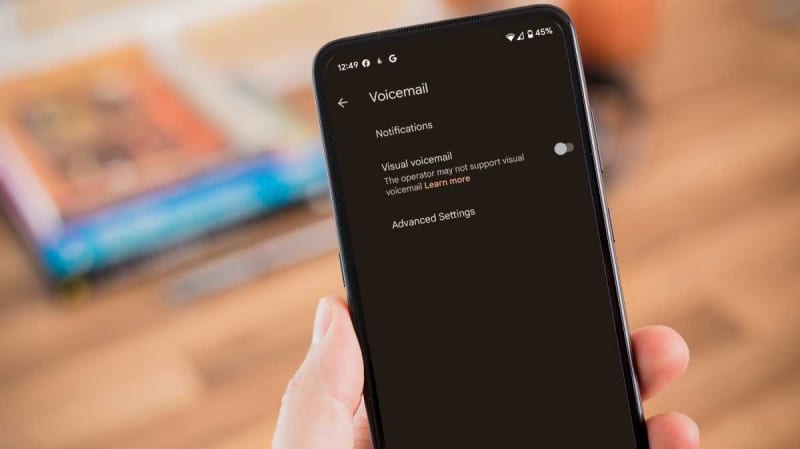
If you don’t want to bother someone, then you can check it yourself by opening the ‘Phone’ app (the one you use to call people), selecting the three dots in the top right corner and choosing something along the lines of Settings > Voicemail > Advanced Settings > Setup (varies between models).
Martyn Casserly
If there’s a number shown in this section, that means you have voicemail enabled. The phone number won’t be the same as yours though, as it’s the one used to contact your voicemail service.
How to set up voicemail on an Android phone
As stated above, there’s a good chance that your voicemail is already up and running, but if you find that this isn’t the case, it’s a simple process.
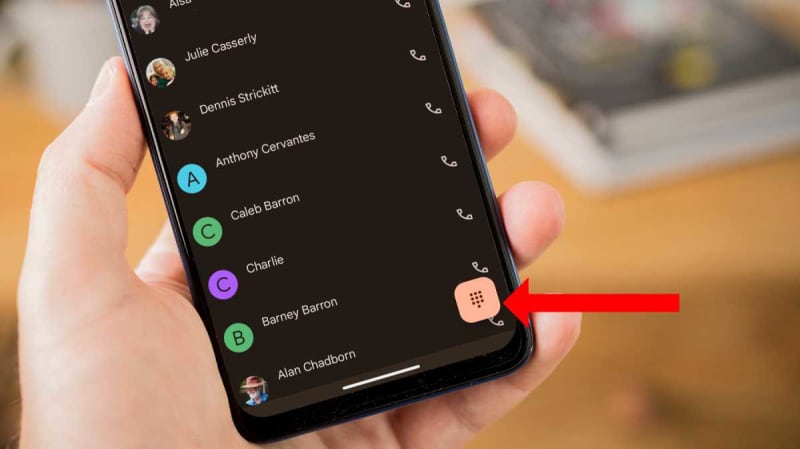
1.
Prepare to call your Voicemail service
Martyn Casserly
First, open the Phone app on your Android device and tap the number-pad icon, as indicated above.
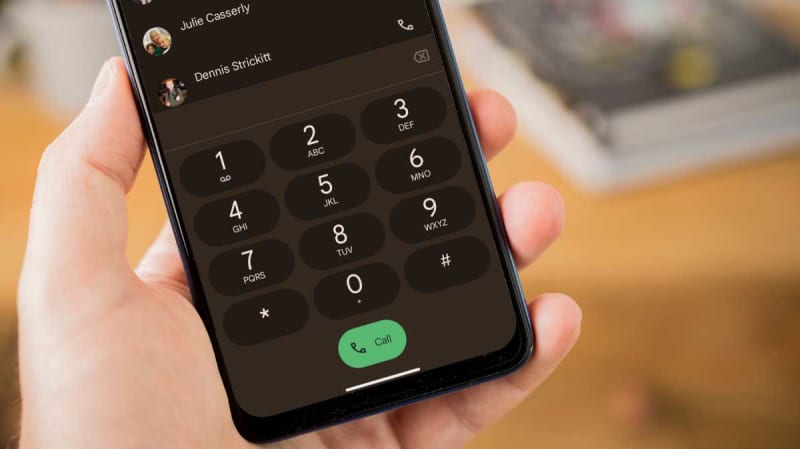
2.
Contact your voicemail service
Martyn Casserly
Press and hold the ‘1’ key until you are connected to the voicemail service. If this doesn’t work, look up what the specific voicemail number is for your network or provider.
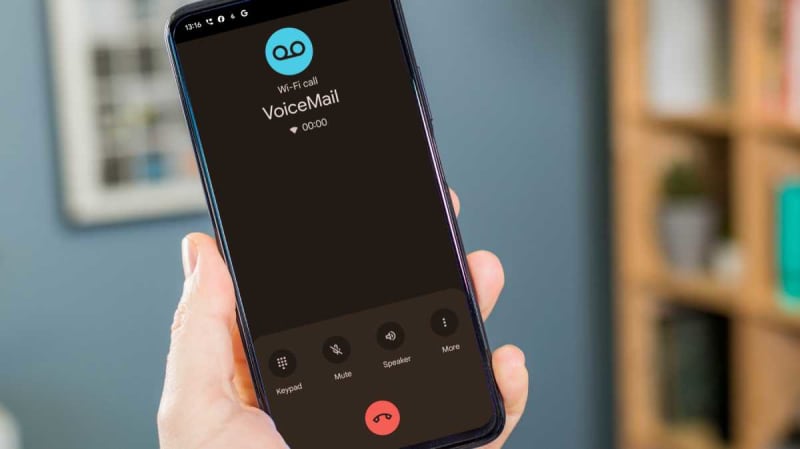
3.
Use the voicemail menu
Martyn Casserly
Once connected, you should be given a few different options, which might include setting up your voicemail or changing your personal settings. Tap the relevant number to proceed to the next stage, including if want to record a message to leave for people.
Choose whichever one is offered, then you’ll most likely be asked to record your message and, if you want extra security, you can create a PIN number that has to be entered before any messages will be read out.
When that’s done, end the call, then call voicemail again to make sure everything is set up as you wanted.
How to check voicemail on Android
When you’re prompted with an alert that you have a voicemail, simply open the Phone app, tap the number-pad icon and type in the voicemail number (sometimes simply press and hold ‘1’).
Tap to call it, then choose the option that allows you to ‘listen to your voicemail’ or similar once connected.
How to change voicemail on Android
The steps may vary slightly, depending on your provider, but they should be very similar to the ones described here.
Open the Phone app, and call the voicemail number. Listen to the options provided until you hear something along the lines of changing your settings.
Tap the relevant number on the on-screen keypad, then one for changing your voicemail greeting or something similar. A beep should indicate when to start recording, and you’ll hear back the audio once it’s complete.
If you’re not happy with it, you can easy re-record before setting it as your greeting.
Why is my phone going straight to voicemail?
Should you find that you’re not getting calls, but they’re heading straight to voicemail, there are a number of potential causes.
Firstly, you may have Do Not Disturb or Airplane mode turned on by accident. You’ll usually find this in the quick settings menu that opens when you swipe down from the top of the screen. Disable both and your calls should start coming through again.
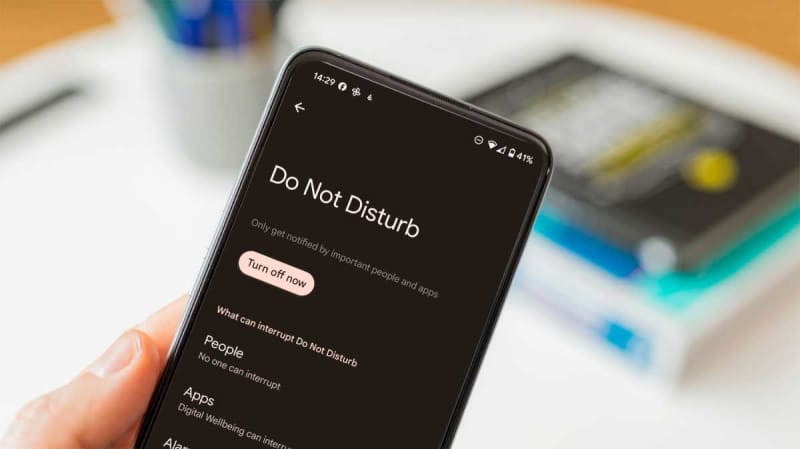
Martyn Casserly
It’s also possible that you may have Call Forwarding or Redirecting turned on, which you can find by going in the Settings and searching for those terms. Where you’ll find them in the app varies by phone software.
Of course, the other simple explanation is that the signal strength in your current location, or the ones where you received the calls, was so weak that the call couldn’t get through.
If that’s the case, just wait until you’re back in a location with stronger signal. Should you need to receive a call immediately, try moving somewhere else to see if there’s any difference.